Installation
1
Remove Tire Teeth™ from bag along with strap retriever.
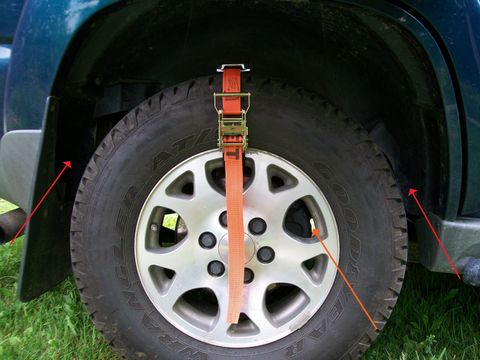
Before
starting installation, verify that there is adequate clearance between the tire, and inner body panels, and outer body panels.
(red) Also, verify there is adequate clearance between
the inner wheel and brake
components (orange).
If using
Tire Teeth™ on the front of a
vehicle, verify that there is
clearance when the steering
wheel is turned between the
tire, brake components, and suspension components. (Refer to
right).
2
Locate a portion of the tire (preferably on top of the tire) that is
in line with the hole or gap in the vehicles rim that does NOT
have
the valve stem.
3
Place traction cleat on top of the tire with
the ratchet end of the strap on the outside of
the tire facing towards you.
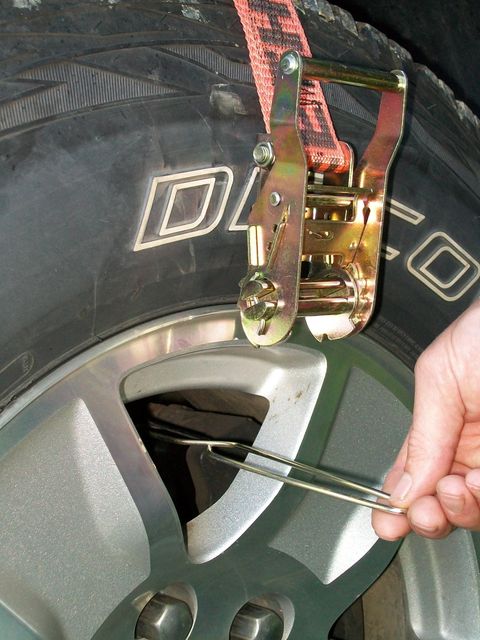
4
Reach through the hole or gap in the vehicle’s rim with the strap
retriever, holding the small end of the strap retriever, reach over
the tire with the other hand, place about six inches (6”) of the
strap into the retriever, and pull it back through the wheel being SURE
that the strap is not twisted or wrapped around any brake
components. Place black strap protector at
the point where the strap goes through the
wheel. (Refer to figure above).
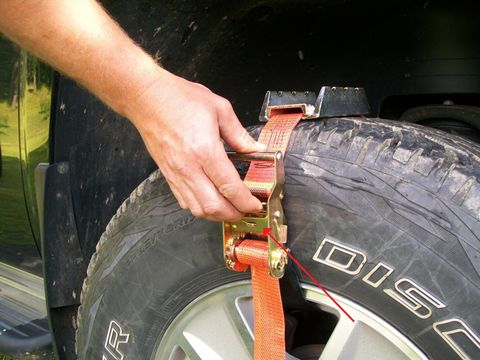
5
Rotate the slotted mandrel in the ratchet and
stop it with the slot towards you.
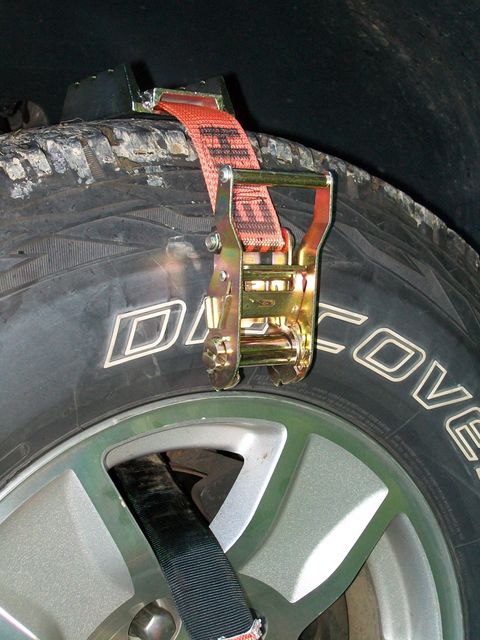
6
Pull strap through mandrel and begin tightening the ratchet by
working the ratchet lever back and forth. Before the strap starts
getting tight, ensure that the strap is not twisted or wrapped
around any brake components. Make sure that the traction cleat
is centered on tread portion of the tire, and not on the side(s) of
the tire. Make sure that the strap protector is between the wheel
and strap.
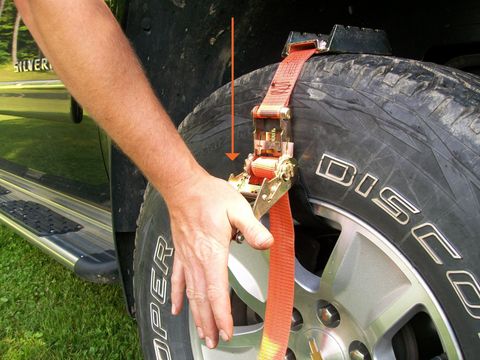
Note:
Keep the ratchet as close to the
wheel as you can without allowing the
ratchet to touch the wheel.
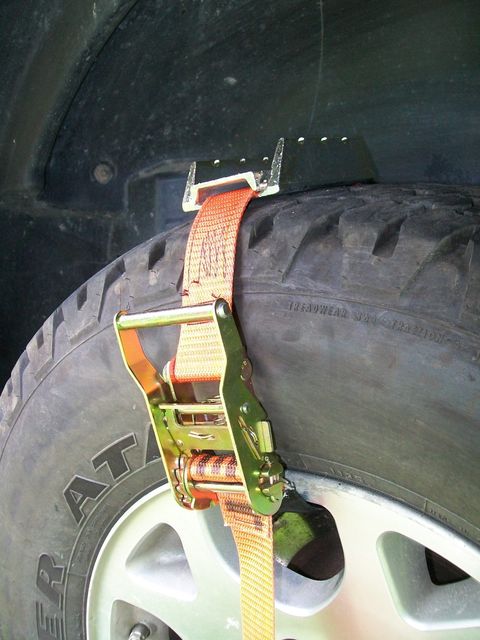
7
Tighten ratchet securely, but not so tight as to strip ratchet
mechanism. Place ratchet in lock position.
Repeat the above process on the opposite side of the vehicle.
Note:
Always apply Tire Teeth™ to both drive wheels.
8
Slowly drive the vehicle out of its stuck position by applying slow,
even power to rotate the tires. Let Tire Teeth™ dig into the
ground to roll your vehicle in the direction you wish to go.
9
9. When unstuck remove Tire Teeth™ immediately.
To remove Tire Teeth™ from the vehicle, raise the lever on the
ratchet handle (red) and open from lock position. Keep rolling the
handle over until it resists. At this point, bump the lever with your
hand and release it (orange) and remove Tire Teeth™ from the
vehicle’s tire.
Always assess every situation for hazards and danger that can cause damage to
property or cause personal injury. Some situations require additional help or the
assistance of another vehicle(s), such as a tow truck. Tire Teeth™ will not get
vehicles unstuck in every situation.
Always apply and install Tire Teeth™ in pairs on opposing drive wheels (i.e., both
on the front wheels of vehicle or both on rear wheels of vehicle)
Exercise extra caution when using Tire Teeth™ on, near or around traffic and/or
roadways. Use all safety procedures in your owner’s manual and observe all
federal, state, and local Department of Transportation guidelines and traffic laws.
To ensure successful use of Tire Teeth™ remove stones and debris from the area
where you are applying Tire Teeth™. This will also help reduce abrasion to
aluminum wheels.
If you have a vehicle with wheel covers, it is best to remove the wheel covers
before installing Tire Teeth™ to prevent damage to the wheel cover. (Smaller
center hub caps do not have to be removed
)